
My followers had an awesome idea I should use my freshly aquired 3dprinter (omg it is so much cheaper since I've got it lol) to pimp up my mask in some way.
I said to myself I'll go for it. I've always wanted to do a postapo prop and I've seen this as the right challenge. I decided to take inspiration from Mad Max's Immortan Joe and his mask/respirator.


 So I've started searching for the right stl around the internet and I found it HERE.
I printed the mask with my Prusa i3 MK2S and PLA Plasty Mladec in silver.
I have to admit, my print failed in the chin area, but I decided to slice the model with Slicer in my PC, print only the chin area, sand it and glue it to the rest of the mask. And I did.
As glue I've used PLA rests mixed with tetrahydrofuran - pvc wielding. I also had to fix a small hole in the nose with wood burning iron and some PLA rests, that I melted into the hole.
 The mask had a different shape than I needed, so I decided to heatform the mask with heat gun to fit better on my mask and I cut almost the whole cheek part to be able to fit the mask on my repirator. I cut it with dremmel tool and I sanded it down. I smoothened the whol mask after it with several layers of tetrahydrofuran till no print lines can be visible. After it I drilled a hole on the sides and led a cord through them to wrap around the filters and hold in the place.
Then I painted the mask using the Immortan Joe mask as a model. I used Artemiss and Pébeo colors and you can see me painting it, when I livestreamed it on my stream:
Sledujte hru Pimping up my safety mask - painting od uživatele DATgermia na adrese www.twitch.tv


 Then I had to switch filaments and I tried using Gembird black filament. Tetrahydrofuran doesn't work on Gembird anymore and it has big troubles by printing, so I do not really recommend this filament. I decided to decorate only the plain plastic transparent cover of particle filters, since they do not have to be exchanged (in comparison with white particle filters and big grey/brown chemical filters).
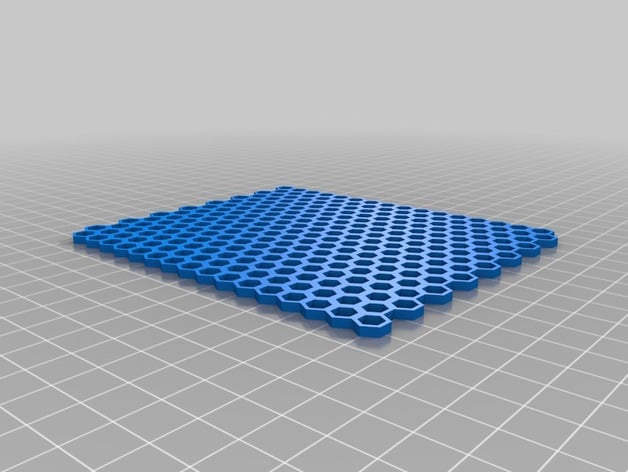
I had an idea to use mesh for covering the plain filter - it can be modelled, printed and formed very easily. But if you do not want to model it, you can download it here. I printed only half of the meshes height, so I can better form it and better handle it. After you print it, the only thing you have to do is the heat it carefully by heatgun and form it around the plastic filter covers. Cut with scissors all the rests of the mesh you do not need.

I used hotglue to fasten all the pieces to the plastic cover.
The last part I wanted to print was a belt, that would decorate the sides of the filter. Do not glue anything to filter itself, just to the plastic cover, since you have to leave the filters interchangeable.
 I thought first about different kinds of belts I can use, even rubber bands, but I stopped my search when I saw this file.
This was absoultely perfect for this job. I had later even some better ideas, so maybe I'm gonna do a second mask later, but this one turned out perfect!

 I printed this belt, but once again, the print failed when it was somewhere aroun 60 %, but I still decided to use it - I do not like making mess and wasting material, so I glued (second glue) the failed pieces together and oh my Gosh! It turned out much better than the original design.I took the belts and glued them with hotglue onto the sides of the plastic cover of the particle filters. Then I panited it with acrylics and DONE.
This process was also streamed on two different videos, so you can take a look:
Sledujte hru Pimping up the safety mask II od uživatele DATgermia na adrese www.twitch.tv
I also showed on my stream how the mask is assembled:
Sledujte hru How my safety mask/respirator works? od uživatele DATgermia na adrese www.twitch.tv

I hope this article will be useful for someone and if yes, you can follow my work on cosplay (and other stuff) on my FACEBOOK PAGE or TWITTER or INSTAGRAM.
And if you like this stuff I do, you can support my work by donating on my PATREON.
Yours
Germia
0 komentářů:
Okomentovat